


At AAMCO of Keller our goal is to be your locally trusted auto repair experts to keep you and your car safely on the road. We also aim to educate our customers of common car issues they may face while on the road and the best advice to handle that situation.
So you’re leaving work and you realize you left your car lights on all day and now your vehicle won’t start. As a well prepared motorist we always suggest that you keep a reliable pair of jumper cables in your car for situations just like this. Having the right emergency equipment is the first important step. You also have to know how to use it. So, here is what you need to know about how to jump a car battery.
Being prepared with the right Jumper Cables
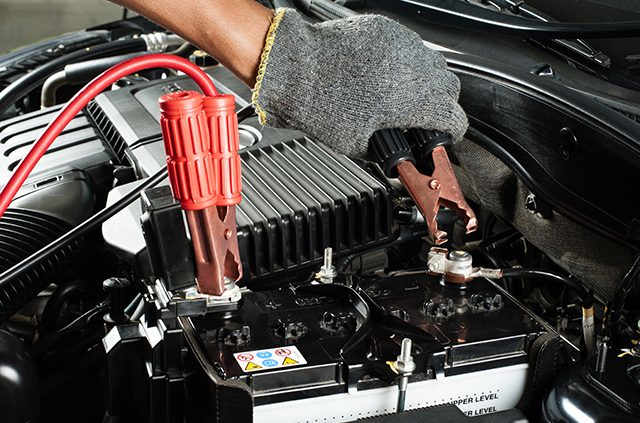
Jumper cables are long, thickly insulated cables with toothy clips on one or both ends. These clips are called alligator clips (because they look like alligator heads). The clips are distinguished by color, usually red and black, to indicate positive and negative polarity. The red clip is positive. The black clip is negative.
Jump boxes are portable batteries used to jump start a vehicle without connecting to another vehicle—come with special jump cables. These cables connect the jump battery directly to the dead car battery. Road side assistance usually uses a jump box when helping stalled vehicles.
Jumper cables are the most popular tool used to jump start cars because they are inexpensive and easy to store. Jumper cables usually come in a variety of lengths, ranging from 10-20 feet. Some people think longer cables are better so that you do not have to move a car with a dead battery. But, while longer cables provide convenience, they may lose power as the longer the cable, the farther the energy has to travel. The gauge of the cable denotes the strength of the cables. The lower the gauge, the thicker the cables and the stronger they are. Gauge six is a standard size for jumper cables.
Safety First When You Jump a Car Battery
You should consider all safety risks before performing any basic maintenance or repair on your car. First, make sure that small children are in a safe area away from the engine while you are establishing how to jump a dead car battery. Take a moment to read the manual of your car. Some vehicles require extra steps in order to have a successful jump. If you’re unsure of what to do, call AAMCO of Keller at (817) 431-0009 for advice. Assuming that your car will permit a jump, you should be careful to prevent dangerous electric shocks. When you handle the jumper cables, be aware that their function is to transmit electrical current from one car to another. Once one end of the jumper cables is connected to a car, do not touch the metal clamps to anything but the appropriate target. It’s highly recommended that you wear the proper safety protection gear such as safety classes to avoid possible sparks flying.
How to Jump a Car Battery
Step 1: To ensure that the car donating a charge (the donor car) is protected, take these precautions. Match the kind of voltage system of the donor battery to the dead battery to be jumped. For example, a 6V and a 12V should not be used together. A quick test that there is enough voltage for the donor, be sure that the car giving he jump start’s headlights are steady and bright when the car is started. If the headlights dim, that can signal that the battery is low.
Step 2: Park the vehicles next to each other. Park the functioning car so that the vehicles face each other, preferably only about 18 inches apart, but never touching each other. For automatic transmission cars, put the vehicle in park; for a manual transmission, set the vehicle to neutral. Set the parking brakes on both, so neither car moves unexpectedly.
Step 3: Both vehicles should be off. Set the parking brakes and remove the keys. Set down the jumper cables on the ground, making sure the clamps do not touch each other.
Step 4: Open the hood to both cars, and locate the batteries (refer to the owner’s manual for battery location) and battery terminals. Usually, the two terminals on each battery will be covered in red or black, with a + or – sign on top. Look at the batteries and make sure that you can identify which is positive, and which is negative. This distinction is crucial to the success of your jump. If the battery terminals are dirty, wipe them off with a rag or wire brush.
Step 5: Attach the red, positive cable clamp to the positive (+) battery terminal of the dead battery. You want a solid connection to the battery terminal, which may require some initial wiggling of the clamps
Step 6: Attach the other red clamp to the positive terminal on the working battery. Attach the red, positive cable clamp on the other side of the jumper cables to the functioning vehicle’s positive (+) battery terminal.
Step 7: Attach the partnered black clamp to the negative terminal on the working battery. Connect the black, negative cable clamp to the working battery’s negative (-) battery terminal.
Step 8: Walk over to the car with the dead battery. Do not connect the black, negative cable clamp to the dead battery. Instead, attach that clamp to an unpainted, metal part of the car such as a shiny, clean nut on the engine block. This will help ensure a safe jump.
Step 9: Start the working vehicle. Wait a minute or so. Depending on the age of the battery and how long since it died, you may need to let the car run for a minute or two to get the jump to work.
Step 10: Try starting the dead car. If the car doesn’t start, allow the working vehicle to charge the battery for an additional minute or two before attempting again.
Step 11: If it doesn’t turn on, try revving the engine of the working vehicle. In some instances, slightly revving the engine of the working car while charging the dead battery may help.
Step 12: Once the dead car is running, you may disconnect the jumper cables, starting with the black, negative cable clamps. Do not let the clamps touch each other while any part of the cables is still attached to a car.
Take a short drive to help recharge the battery. This will allow the battery to build up a charge. This driving allows the vehicle’s alternator to charge the battery and ensures that your vehicle does not die again once you turn it off.
The vehicle with the dead battery should be allowed to run for 30 minutes if possible. This will let the alternator fully charge the battery. If your battery continues to lose a charge call AAMCO of Keller to perform a diagnostic test on your car battery.
What If Your Jump Start Doesn’t Work?
If the jump fails to start your car after a few short attempts, or if the car starts but then dies again, you have some other issues you need to address. Most batteries are rated to last 4-6 years. If your battery is old, you may need to replace it. If the battery should be working well, you should consider other possible problems with other components
Dealing with a dead car battery is a pain. Luckily, getting your car working again is not terribly difficult. By following these instructions, using your jumper cables sensibly, practicing safety and addressing other potential concerns, your car will run better, be safer, and last longer.
If you have questions about jumping your car or your vehicle won’t respond to a jump start give the experts at AAMCO of Keller a call at (817) 431-0009 to answer your questions or to schedule an appointment for a full diagnostic test.
AAMCO Of Keller, TX – Car Radiator & Cooling System Experts
AAMCO Transmissions of Keller our technicians are the best trained in the industry with not only 20 years experience on new cars but also over 50 years experience in the automotive industry. Our goal is not only to provide the best product in the industry but also the best customer service available. A recent survey showed that over 95% of cars serviced with major repairs at AAMCO are still in service with many reaching the 100,000 mile range without failure.
At AAMCO of Keller we believe that getting the best value for your dollar is the most important part of any repair. That is why all of our services come with a minimum of a one year warranty and not the typical 90 days provided by most repair shops. We use only the highest quality parts available.
AAMCO of Keller is a full-service auto repair and preventive maintenance center. We are automatic and manual transmission experts. We provide transmission service and maintenance as well as transmission flush & filter service. We are conveniently located for your service and maintenance needs and we are qualified to repair and service all domestic and imported cars, trucks, and SUV’s using parts that are equal to or exceed the standards of those parts originally used by the manufacturers. We are definitely the cost-effective alternative to car dealership servicing for all scheduled maintenance of your personal or company auto, pickup or truck. Regardless of where it was built, we will service your car or truck and still maintain the manufacturer’s warranty. We honor most extended warranties.
AAMCO of Keller is independently owned and operated. We pride ourselves on getting the services or repairs on your auto right the first time by our highly qualified service technicians. So drop your auto, SUV, or truck off today and allow us to provide you with excellent service. We look forward to servicing your vehicle.


